Getting Started
Create your account, add credits, and run your first skip trace — a five-minute tour of the platform.
1. Create your account
Head to the signup page and register with your email and a password, or use Continue with Google. You'll be asked for a username and phone number, and a quick bot check runs in the background. If you signed up with email, confirm your address from the verification email before logging in.
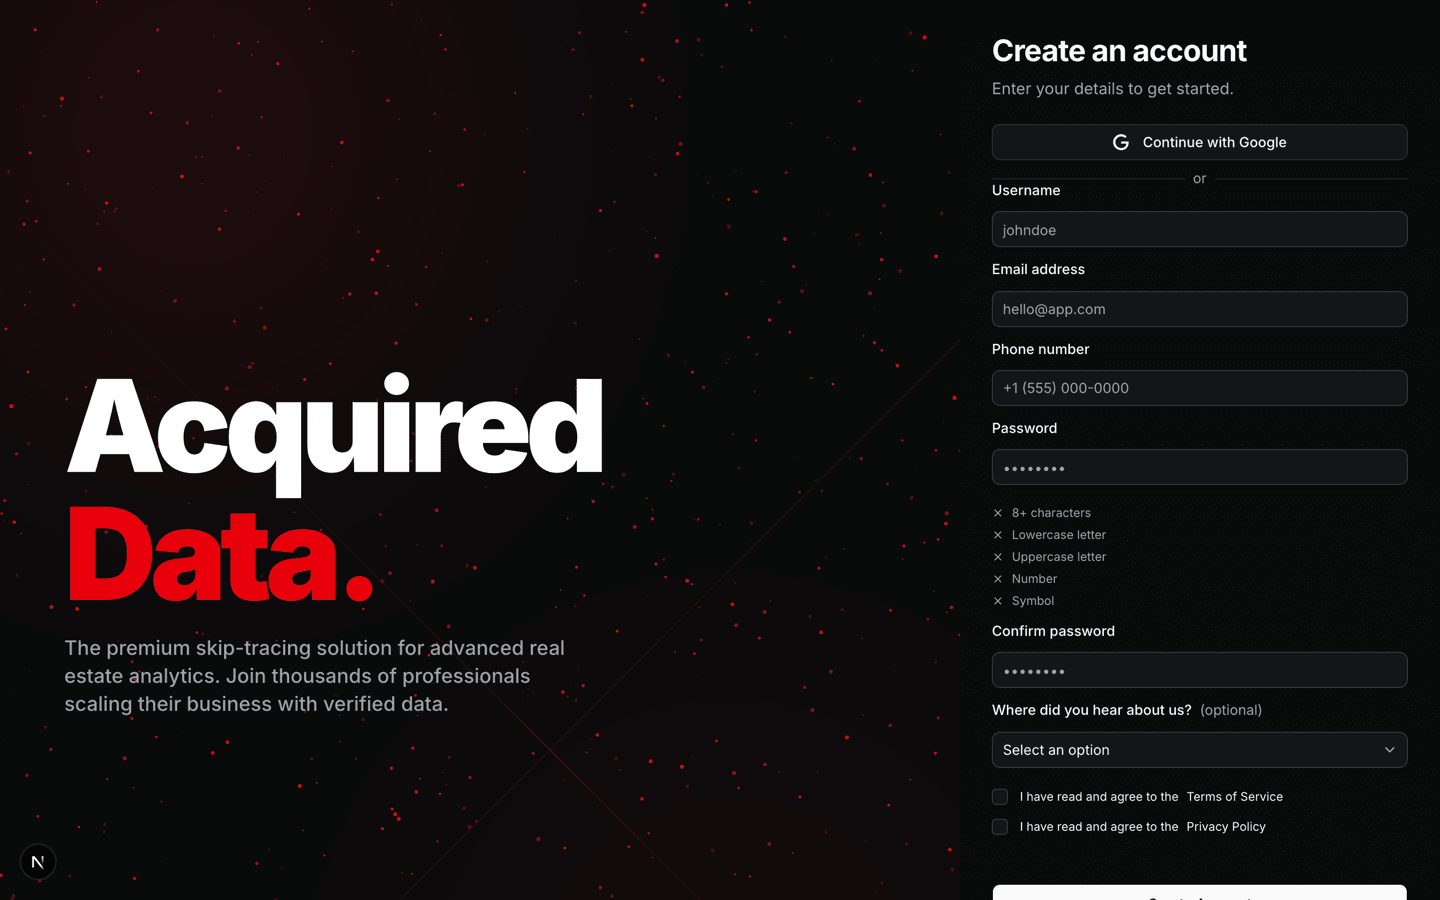
A note on sign-in security: if you log in from a new location or come back after 30 days away, we'll email you a one-time code to confirm it's you. That's expected — see Account Settings and Security for details.
2. Add credits
Everything on the platform — skip traces, property pulls, buyer searches — is paid for with credits. From the dashboard, click Purchase in the header (or go to Billing) and choose between:
- One-time credit packs — pay as you go; credits never expire and the per-credit rate drops at higher volumes.
- Monthly plans — a credit allotment that refreshes every billing cycle at a lower effective rate. Cancel anytime; your plan stays active through the period you paid for.
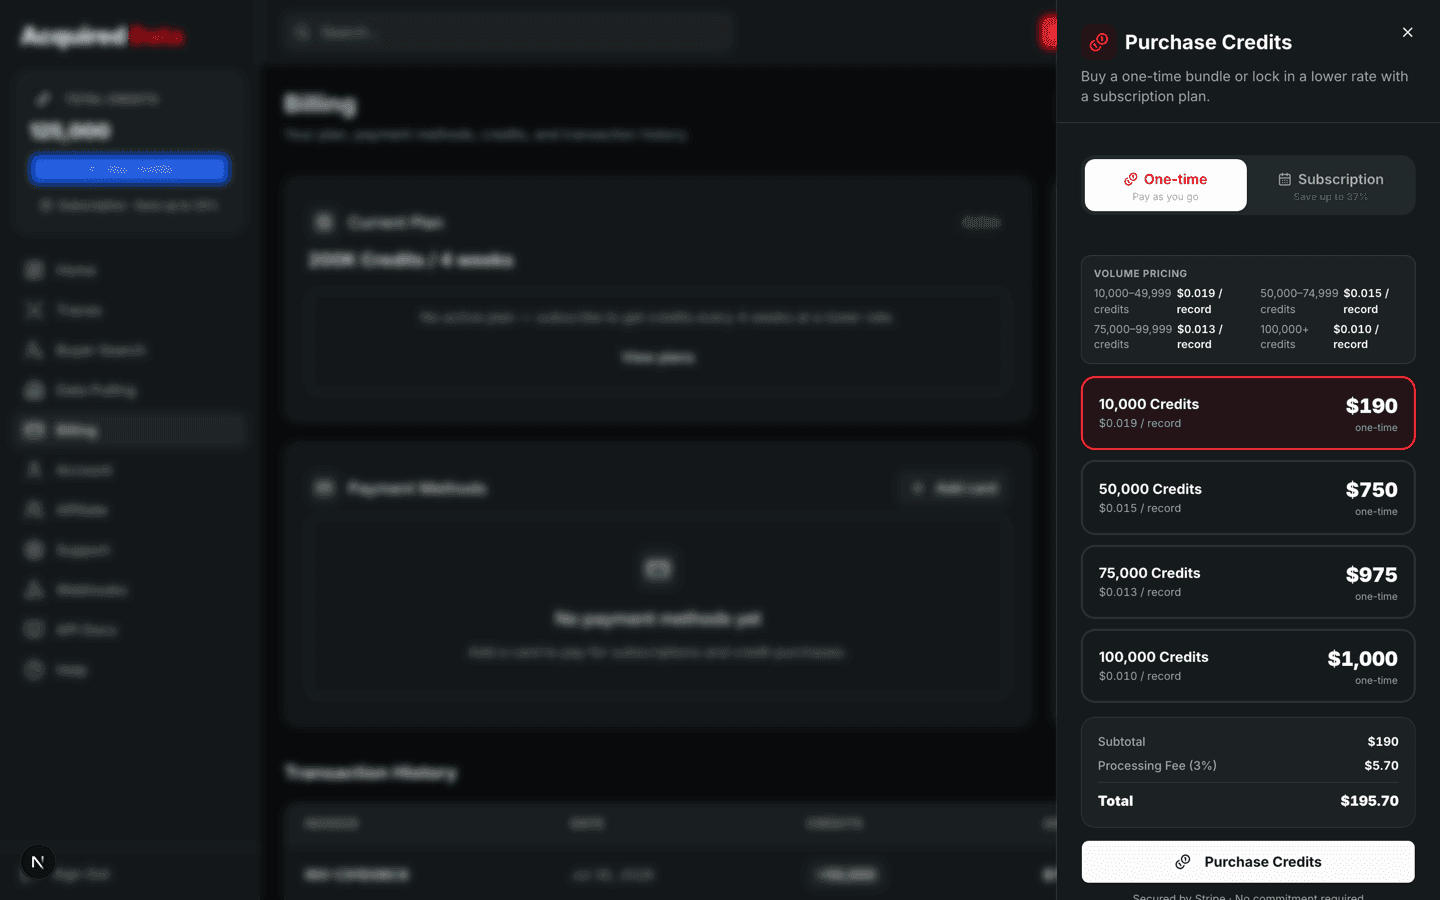
The full breakdown — per-operation costs, the two credit buckets, fees, and refund rules — is in How Credits and Billing Work.
3. Find your way around
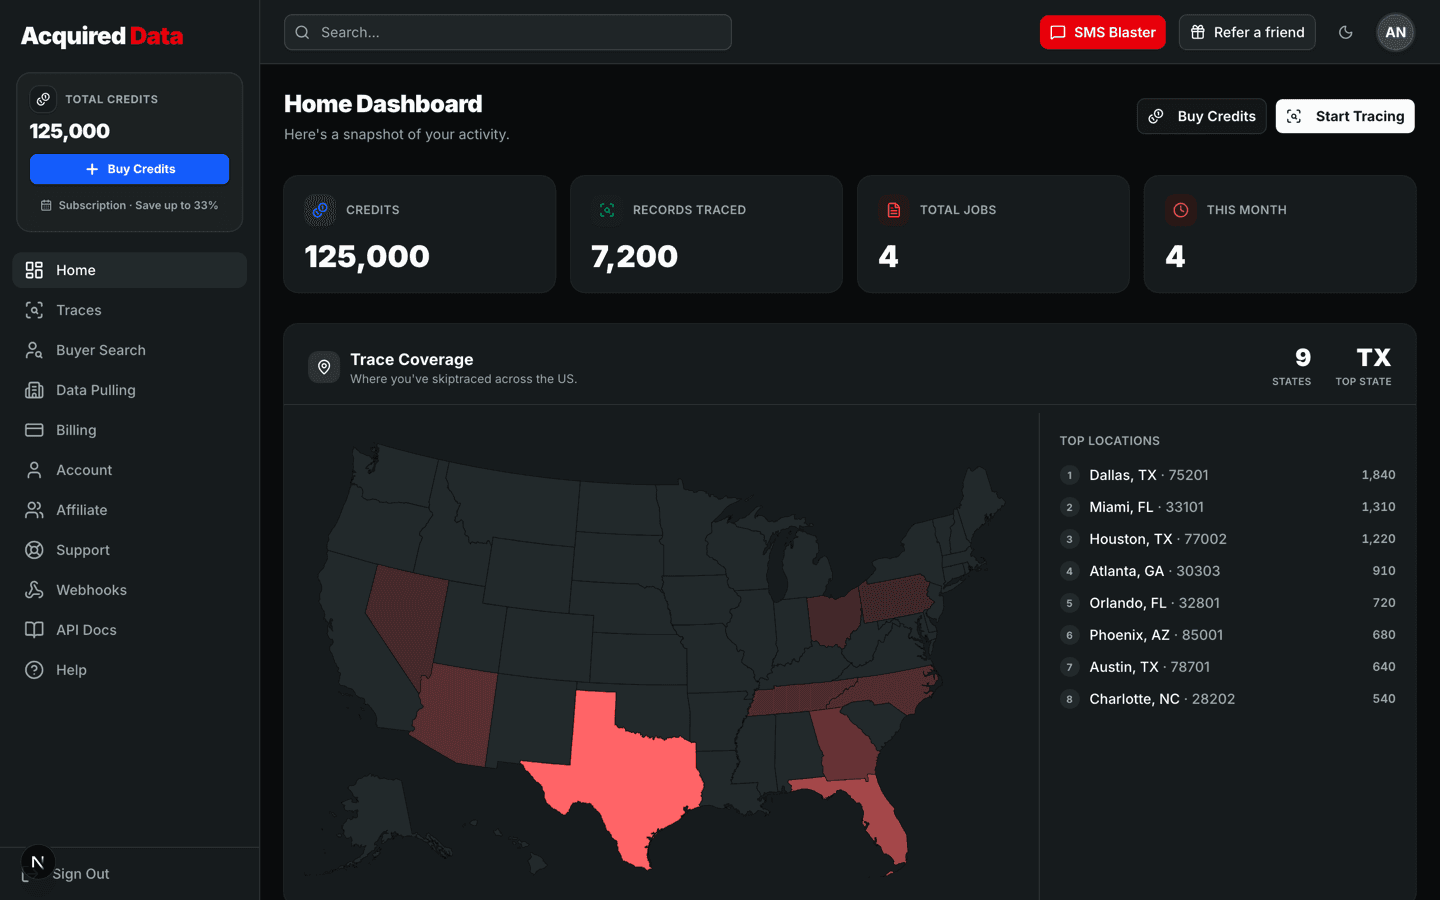
The dashboard sidebar is the map:
- Home — your credits, usage stats, trace coverage map, and recent jobs.
- Traces — the core skip-tracing tool: bulk CSV uploads and single lookups.
- Buyer Search — find investors actively buying near a property.
- Data Pulling — build property lists from filters like absentee owner or high equity.
- Billing — credits, plans, and invoice history.
- Account — profile and security settings, plus your referral link and commission earnings.
- Support — open a ticket with our team.
- Webhooks — completion notifications and API keys.
- API Docs — the full in-app API reference.
4. Run your first trace
The fastest way to see the product work is a single trace: open Traces, switch to the Single Trace tab, enter an owner name and property address, and run it. Results appear inline in a few seconds. A single lookup costs 2 credits (6 for an LLC or trust — the system resolves the entity to the person behind it).
Have a whole list? The bulk wizard walks you through uploading a CSV, mapping columns, picking add-ons, and downloading results. Follow Bulk Skip Tracing step by step.
Where to go next
- Premium Add-Ons Explained — DNC scrubbing, phone verification, LLC resolution, and more.
- Finding Cash Buyers Near a Property — build a dispo list from real purchase activity.
- API Quickstart — automate all of it programmatically.
- Getting Help — how to reach us when something's off.
Keep reading
Bulk Skip Tracing: Upload a List of Property Owners
Step-by-step walkthrough of the four-step bulk trace wizard, from CSV upload to downloading results.
Read →Skip TracingSingle Skip Trace: Look Up One Owner
Run a one-off lookup for an individual or company and read the results inline.
Read →Skip TracingPremium Add-Ons Explained
Every skip-trace add-on, what it returns, what it costs, and when to use it.
Read →